Planning your journey on the Salkantay Trek to Machu Picchu is the first step to an absolute bucket-list experience. Because it’s one of the new seven wonders of the world, figuring out how you want to challenge the high altitude requires some serious preparation.
That’s exactly why I am here.
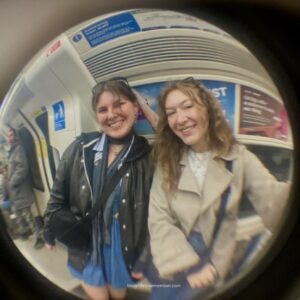
I recently did the 5-day Salkantay Trek to Machu Picchu in February, right in the middle of the Peruvian rainy season. Going with a guided tour from Machu Picchu Expeditions, it turned out to be the adventure of my life. If you’ve heard rumours that the wet season ruins the trail, or that the classic Inca Trail is your only good option, I’m here to clear up some myths. I have so much to unpack for you.
Before you start reading, I’d recommend to play my “high altitude, higher vibes” playlist in the background. It’s packed with bangers that perfectly capture the energy of backpacking through South America. It will hype you up, I promise! – Spotify – “high altitude, higher vibes”
Let’s get into it!
1. Choose your Company and Itinerary
There are several ways to reach Machu Picchu from Cusco, which is easily one of my absolute favourite cities in Peru. Depending on your budget, time and how much adventure you’re craving, you generally have four options:
*All options lead you to Aguas Calientes (the town closest to Machu Picchu). Then you can either take a bus up to Machu Picchu, or walk by yourself (4km walk, including around 2000 steps uphill).
- The Train (comfy and fast): You take a scenic train straight to Aguas Calientes. It’s the easiest but most expensive option.
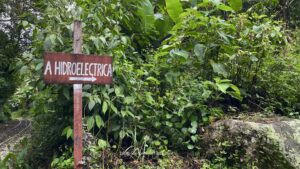
- The Hidroeléctrica Route (not so comfy, but cheaper): You take a long, incredibly bumpy van ride to a Hidroeléctrica station and then walk 3 hours along the train tracks to Aguas Calientes. It takes a long time, but it’s cheaper.
- The Do-It-Yourself Hike (lowkey risky): You can technically try to backpack and navigate the mountains on your own. We actually met a couple doing this, but honestly it takes a lot of planning and can be really dangerous safety wise. I wouldn’t recommend it, especially if you’re not experienced.
- The Guided Tours (my recommendation): You book a multi-day trek where you get the full mountain experience. Hiking through insane landscapes, sleeping in campsites, enjoying three included meals every day, getting local insights and bonding with a group of strangers. It’s tough, but you truly earn that final view at the end.
If you want the full experience, the guided tour is the way to go!
Pro-Tip: Booking Your Machu Picchu Circuit
No matter how you get to Aguas Calientes, you cannot just walk freely around Machu Picchu anymore. The Peruvian government uses strict walking paths and you have to book a specific entry time slot. Your trekking company will usually book this for you, but you need to communicate if you want early access!
We specifically aimed for Circuit 2 (the classic circuit) with a 7:00 AM entry slot. It takes you up to the lower terrace to get that iconic panoramic photo and then lets you walk through the ruins to explore the temples up close.
Why the Salkantay Trek Beats the Classic Inca Trail
When looking into treks, you will instantly run into the debate: Salkantay vs. the classic Inca Trail. While there are only a few alternative routes, these two are by far the most famous and popular ways to hike to Machu Picchu. For me, the choice was easy. Partly because I hiked in February, which is the peak of the rainy season.
Fact Check: The classic Inca Trail is completely closed by the government every single February for environmental recovery and trail maintenance.
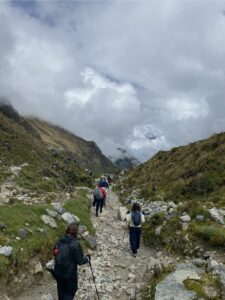
Because the Inca Trail was out of question, Salkantay became our best option and honestly, I am so glad it did. Even in the dry season, the Inca Trail can be challenging to book (you have to book up to 6 months in advance) and it might be packed with crowds. The Salkantay Trek is far less commercialised, offers a higher altitude challenge (reaching 4,630 meters) and takes you through every landscape (literally we experienced rain, snowy mountains and the hot jungle in just one day, only through hiking).
My Experience with the Companies: Local Trekkers Peru & Machu Picchu Expeditions
Because February is the low season, there aren’t that many tourists hiking. To still function with lower demand, local operators will sometimes combine their hikers. We originally booked our tour through Local Trekkers Peru, who handled our pre-trip briefing and gave us our gear in Cusco. However, our actual guides were from Machu Picchu Expeditions.
I highly recommend checking out both of these companies. They offer a very similar service, so keep an eye out for who is offering the best price-value ratio when you book.
Two things made the crew stand out:
- Incredibly Vegan-Friendly: I shared my dietary restrictions in the booking and they took it really seriously. The chefs always cooked extra vegan dishes and had plenty of vegan options on the shared plates. I never felt left out, or like I was getting lesser portions.
- Queer-Friendly: I hiked with my friends, who are a queer couple. The entire team made them feel incredibly welcome and comfortable. There were zero weird vibes or looks.
Beneath you’ll find the links to both offers.
Local Trekkers Peru Website
Machu Picchu Expeditions Website
Machu Picchu Expeditions Tripadvisor
2. Choose the right season
Timing is everything here, because the weather can completely change your experience. The best time to hike to Machu Picchu is during the dry season, from May to October. This is when you are pretty safe to get great weather and clear views.
But we didn’t really have a choice, since February was our only option. We strategically planned the trek for the very end of our trip, hoping the weather would start to improve. So if you only have the option to go during the rainy season, let me calm your nerves right now.
Yes, it can rain, create mud, or cause landslides. But it doesn’t have to ruin your trip. For us, the weather was actually a bit cooler, which made walking so much nicer. It still got hot at times, but I’m glad it wasn’t any hotter! We had amazing weather overall and it literally only rained two to three times while we were hiking, which was totally manageable.

One Possible Problem: A Foggy Machu Picchu
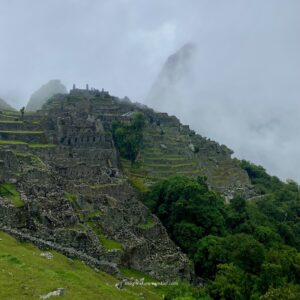
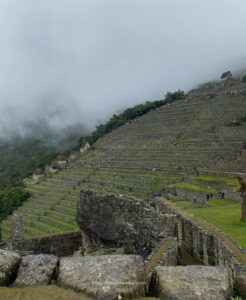
The only day I was a bit disappointed was the final day. When we got up to Machu Picchu, it was raining quite a lot and our view was covered in clouds. We could barely see anything at the beginning, but mountain weather changes incredibly fast. If this happens, be patient! We waited until we got a beautiful view of the area.
3. Day-by-day Recap & Itinerary – 75 km to Machu Picchu
To get a full insight at the standard itinerary, you can check out the Machu Picchu Expeditions Website or the Local Trekkers Peru Website. But for a personal day-to-day experience, here is exactly how it went down, according to my travel diary.
*The day before the hike, we had a briefing in Cusco and got our gear: a duffle bag, a sleeping bag and walking sticks. We packed precisely so we were ready for the early morning pickup.
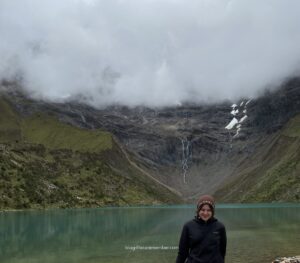
Day 1: Cusco to Challacancha, Humantay Lake and Soraypampa
– Distance: 10 km
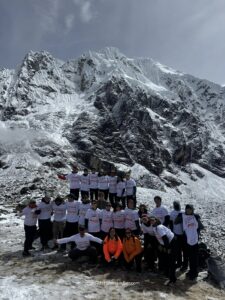
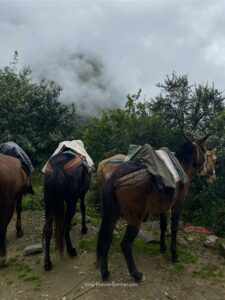
Early in the morning, the bus picked us up straight from our hostel (which is amazing, they will come to you no matter where you stay). After a breakfast stop, we reached the starting point where our duffel bags were loaded onto horses. Our group was super fun, we were around 25 people, mostly in their twenties. But the real stars were our guides, Tupac and Omar. Their energy was insane, I felt so hyped and supported from start to finish. They named our group „sexy pumas“ which became our official team name for the week.
We hiked up to the famous Humantay Lake. The turquoise water against the mountains is beautiful and there were so many wild horses in the area. Afterward, we headed down to our first campground at Soraypampa for lunch and dinner.
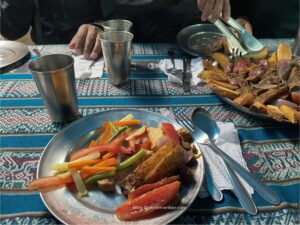
*We always had our meals together on one huge table. You start with soup, followed by big shared platters. I really enjoyed the food, though some complained it wasn’t enough, so definitely pack snacks! At every meal, they serve coca tea. It’s a tea made out of coca leaves, which is completely legal in Peru and an important local remedy for altitude sickness. Thanks to drinking it three times a day, I barely felt the height at all.
Day 2: Over the Salkantay Pass to Chaullay
– Distance: 22 km
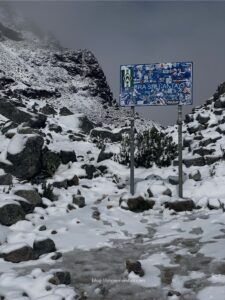
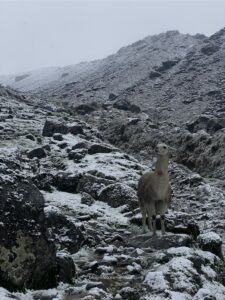
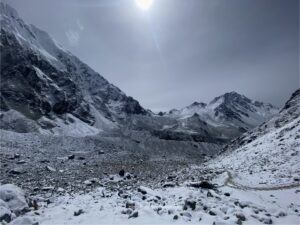
We were all terrified for day 2 because it’s an uphill climb to the highest point of the trek: the Salkantay Pass (4,630m), also known as the “Gringo-Killer”.
*You do have the option to rent a horse that carries you up if you’re struggling, but here is my very honest opinion: you chose a hiking trip. Sometimes you have to push your boundaries and get up that mountain yourself. Those horses suffer enough and shouldn’t pay for your choices.
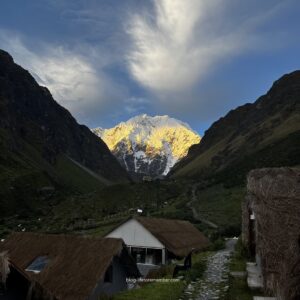
We all made it to the top and felt incredibly proud. At the pass, Omar led a beautiful ritual to thank the Apus (the mountain spirits). The weather on day 2 was absolutely insane. We started in the rain, which turned into thick snowflakes and then as we reached the jungle, it got so warm I had to get rid of all my layers.
Day 3: Chaullay to Lucmabamba (Hot Springs & Party)
– Distance: 16 km
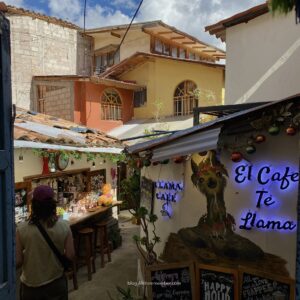
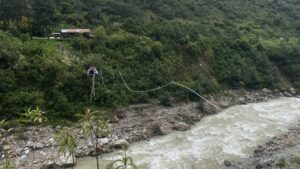
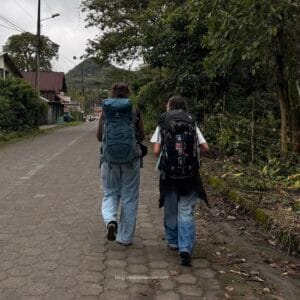
My legs were hurting so badly this morning that I could barely walk down the steps of the campground. But there was no turning back! As we walked along the river valley, our guides gave us natural face paint from local plants. We even crossed a river in a rustic cable car, right before a van picked us up to take us to a local coffee tour. It was such a relaxing and fun experience, finally no walking haha.
From there, the afternoon was pure relaxation. Some people paid extra to go zip-lining and later the whole group went to the Hot Springs, a thermal bath. That night turned into an absolute party. It was such a fun bonding experience, but let’s just say we were all quite drunk… which made the next morning pretty rough.
Day 4: Lucmabamba to Llactapata & Aguas Calientes
– Distance: 24 km
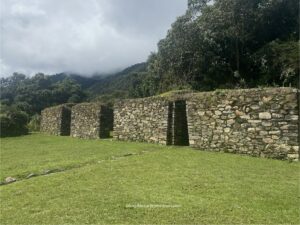
Hiking uphill and downhill to Llactapata was exhausting, but reaching the ruins made every single step worth it. This spot is a total gem because it gives you your very first glimpse of Machu Picchu, sitting right there on the mountains on the other side. It was also the exact moment I realized just how many butterflies live out here. They were absolutely everywhere and I was so excited. After soaking in the views, we made the final way down toward Hidroeléctrica.
From Hidroeléctrica we had a long walk along the train tracks to Aguas Calientes. My feet were hurting a lot at that point, but arriving at an actual hotel with a warm shower felt like heaven.
Day 5: Machu Picchu
– Distance: varies (bus or 4km stair climb) + optional 10 km back to Hidroeléctrica
Finally! Rules at Machu Picchu are incredibly strict. You need to bring your physical passport, can’t take large backpacks (there is a storage area at the gate) and you have to stay in your one-way circuit.
*Because it’s a strict one-way circuit, you cannot turn around or walk backward once you pass a spot. If you want a specific photo, take it immediately and tell your guide to slow down! We realised this too late and were disappointed we couldn’t go back.
As I mentioned before, the fog hid our view, but after some time it eventually changed and we got a really pretty view of Machu Picchu. It was amazing, but honestly? Because of the heavy crowds, the ruins weren’t even my main highlight. The hike through nature, connecting with a group of strangers and sharing rituals was what I loved most.
To get home, you can take a train back to Cusco. But since we wanted to save money, we actually turned around and walked the 3 hours back along the train tracks to Hidroeléctrica to catch a cheap van. We saved cash, so it was a win, but I don’t know if I’d do it again.
4. Preparation & Packing Guide
Physical Preparation
One of the biggest questions you might have is: Can I actually do this hike if I’m not a regular hiker or super well trained?
As someone who is definitely not in their hiking era and usually prefers almost any other activity over hiking, I can confidently tell you: yes, you can absolutely do it.
It is exhausting and challenging with some seriously long days on your feet, but if you have a baseline level of fitness, you will be completely fine. In our group of 25, most of us weren’t professional hikers at all. We all just found our own pace. The faster hikers (I blame their long legs) would wait at specific spots for the rest of us to catch up before we all moved on together. Plus, you’re never alone. There’s always one guide at the front and another at the very back making sure no one gets left behind.

Surviving the Altitude
The altitude is a real factor, but it’s all about how you prepare:
- Acclimatise in Cusco: Since Cusco sits at 3,400 meters, arrive a few days before your trek starts. Letting your body adjust here makes a massive difference.
- Altitude pills: I bought altitude sickness pills at a pharmacy back home and started taking them right on the plane, so I wouldn’t feel sick when landing in Cusco. Keeping them in your backpack during the hike is a great safety net if you feel the altitude.
- Coca candy: Before leaving Cusco, buy some local chocolate and candy made with coca leaves. Combined with drinking enough water and the coca tea, it’s an absolute lifesaver.
The Ultimate Salkantay Packing List
The golden rule here is: layering is key and don’t overpack. I left half of my luggage at our hostel storage in Cusco and only brought the essentials. When you have the briefing, you’ll get a duffel bag that goes on the horses. This has a strict weight limit (usually around 5-7 kg including your sleeping bag). Anything else goes into your personal backpack, which you carry yourself.
Here is exactly what went into my bags:
The Duffel Bag (Carried by Horses)
- Sleeping bag & sleeping bag liner (You can read why a liner is a total game changer right here – The Ultimate Backpacking Packing List: 23 Essentials for Your Next Trip).
- Clothes: Hiking pants, good hiking shoes, a warm sweater/jumper, a hiking jacket, a few shirts, long socks, underwear, gloves, a warm beanie and a sun hat.
- Extras: Flip-flops (for the campsites), a bikini (for the hot springs) and one nice outfit for your photos at Machu Picchu!
- Toiletries: A microfibre towel and only the absolute bare-minimum toiletries.
Your Personal Backpack (Carried by You)
- Must-haves: Your physical passport (you can’t enter Machu Picchu without it) and cash (around 300 Soles per person for snacks, water, using toilets and tips along the way).
- Rain gear: A rain poncho and a waterproof rain cover for your backpack (essential for the rainy season).
- More essentials: Sunscreen, sunglasses, a flashlight, a roll of toilet paper and plenty of blister bandaids. I also highly recommend renting walking sticks directly from your company. Don’t forget your daily essentials like your phone, a power bank and a travel adapter.
- Hydration & Snacks: Start day 1 with at least 1.5 to 2 litres of water in plastic bottles. Pack plenty of snacks, especially that coca chocolate!
For a deeper look into the exact gear that keeps me moving around the world, make sure to check out my Backpacking Packing List and Emma’s Travel Essentials Guide!
*Don’t panic if you don’t have all your gear yet, Cusco is the perfect place for hikers. You can easily dedicate a day to go shopping for your essentials right in the middle of the city. Plus, plenty of shops offer gear rentals, so you can just hand them back after the trek instead of overpacking for your flight home.
Would I Recommend It?
Honestly? 10/10, absolutely yes.
This is literally the most detailed guide I have ever made and I still feel like I have so much more to say about this hike. The Salkantay Trek is a beautiful and unforgettable lifetime experience. It pushes your boundaries, connects you with strangers and rewards you with stunning views. If you are unsure about booking it, especially during the rainy season, this is your sign to just go for it. Pack your rain poncho, download the playlist and get ready for the adventure.
You will not regret it.
*If you have any questions feel free to leave a comment beneath!
Backpacking isn’t for the weak, especially when it comes to the packing process! To save as much space as possible and avoid overpacking, I’ve put together this backpacking packing list
This week’s blog post is all about our top Travel Essentials that are (in our opinion) necessary when backpacking! We tested all of them during our long and many travels

Travelling is emotionally challenging, and feelings like homesickness can restrict your journey a lot. That’s why I want to share my experiences and tips on how to deal with it.